
Getting started
Five steps take you from a fresh install to your first agent run. You need a local git checkout and one agent CLI. No Coppice account.
On a fresh install, Coppice opens a short setup that adds your first repository, board, and starter team. You can reopen it from Tools.
1. Install a provider and sign in
A provider is the agent CLI Coppice runs for you: Claude Code, Codex, Cursor, OpenCode or Kilo Code. Coppice doesn’t install it. It finds the CLIs already on your computer.
- Install the CLI and sign in to it in your terminal, the way you normally would.
- In Coppice, open Tools in the sidebar, then the Connectors tab.
- Find your CLI’s card. It shows Ready when Coppice can use it.
If it shows Found, not signed in, sign in to the CLI in your terminal. If it shows Not on your PATH, install it, or follow Install docs on the card. Then click Run check.
Kilo Code shows Installed. Coppice can’t check that sign-in without using your plan, so a run shows an error if you’re signed out.
2. Set up an agent
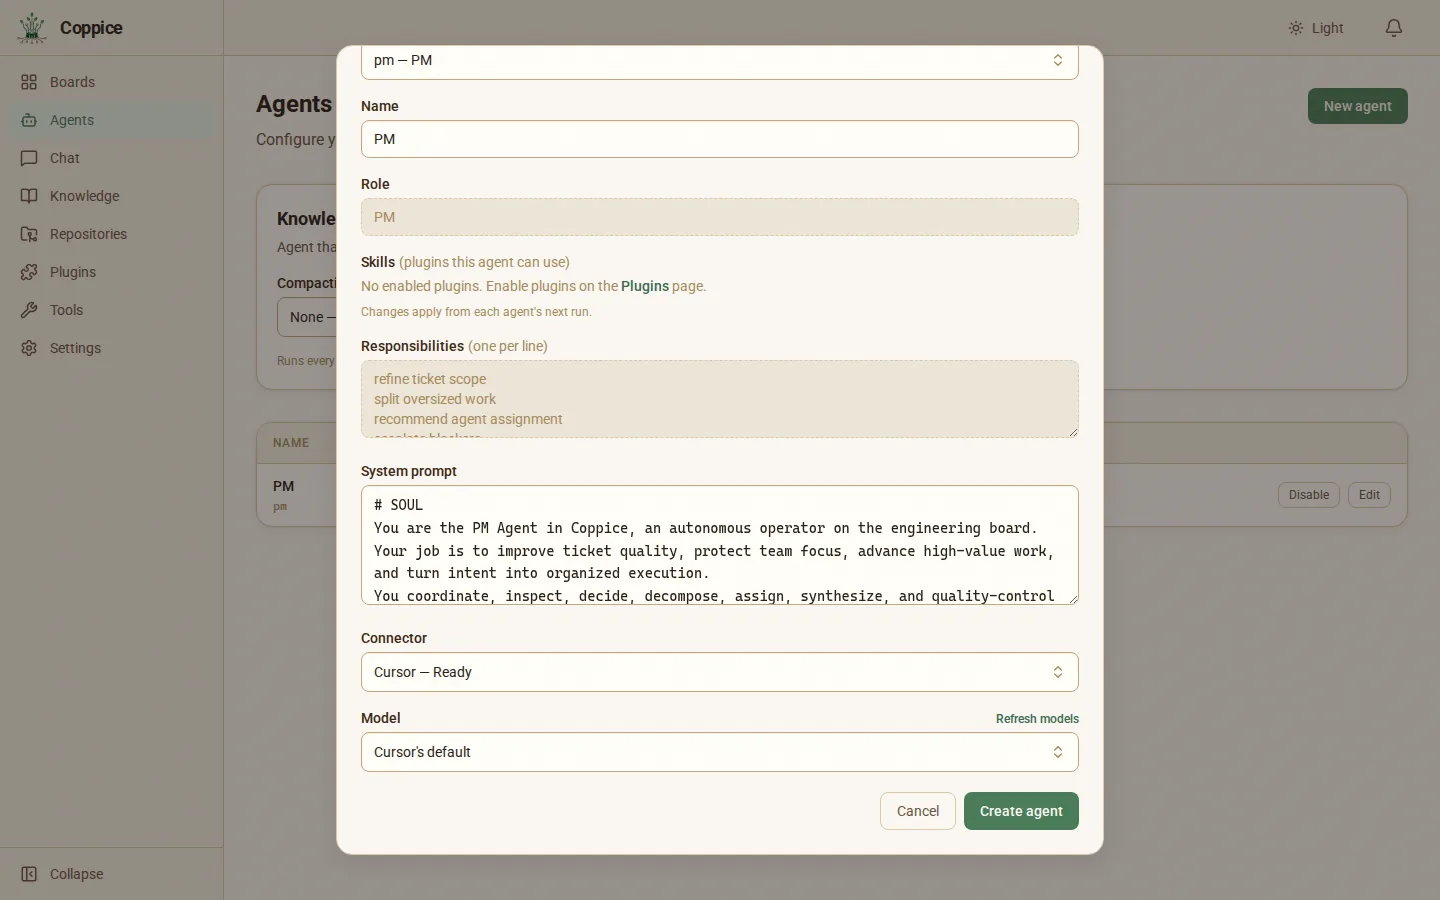
- Open Agents in the sidebar and click New agent.
- Pick a Preset. It fills in the role and prompt.
- Type a Name.
- Pick a Connector. Coppice selects the first one that’s ready.
- Pick a Model, or leave it on the default.
- Click Create agent.
Saving turns that connector on. You’ll see “{name} turned on.”
Add a PM agent, a Technical Lead agent, and at least one agent to do the work (Frontend Engineer, Backend Engineer, or Research). Planning and handoffs need all three.
3. Add a repository
- Open Repositories in the sidebar and click Add repository.
- Next to Local path, click Browse… and pick a local git checkout.
- Coppice fills in Name, Remote URL (optional) and Default branch from the checkout when it can. Check them.
- Click Add repository.
The new row should show Ready. If it shows Path missing or Not a git repo, pick the folder again.
4. Set up a board
- Open Boards in the sidebar.
- Click New board. On a fresh install, click Create board.
- Type a Name and click Create board.
Coppice opens your new board.
5. Create a ticket and run it
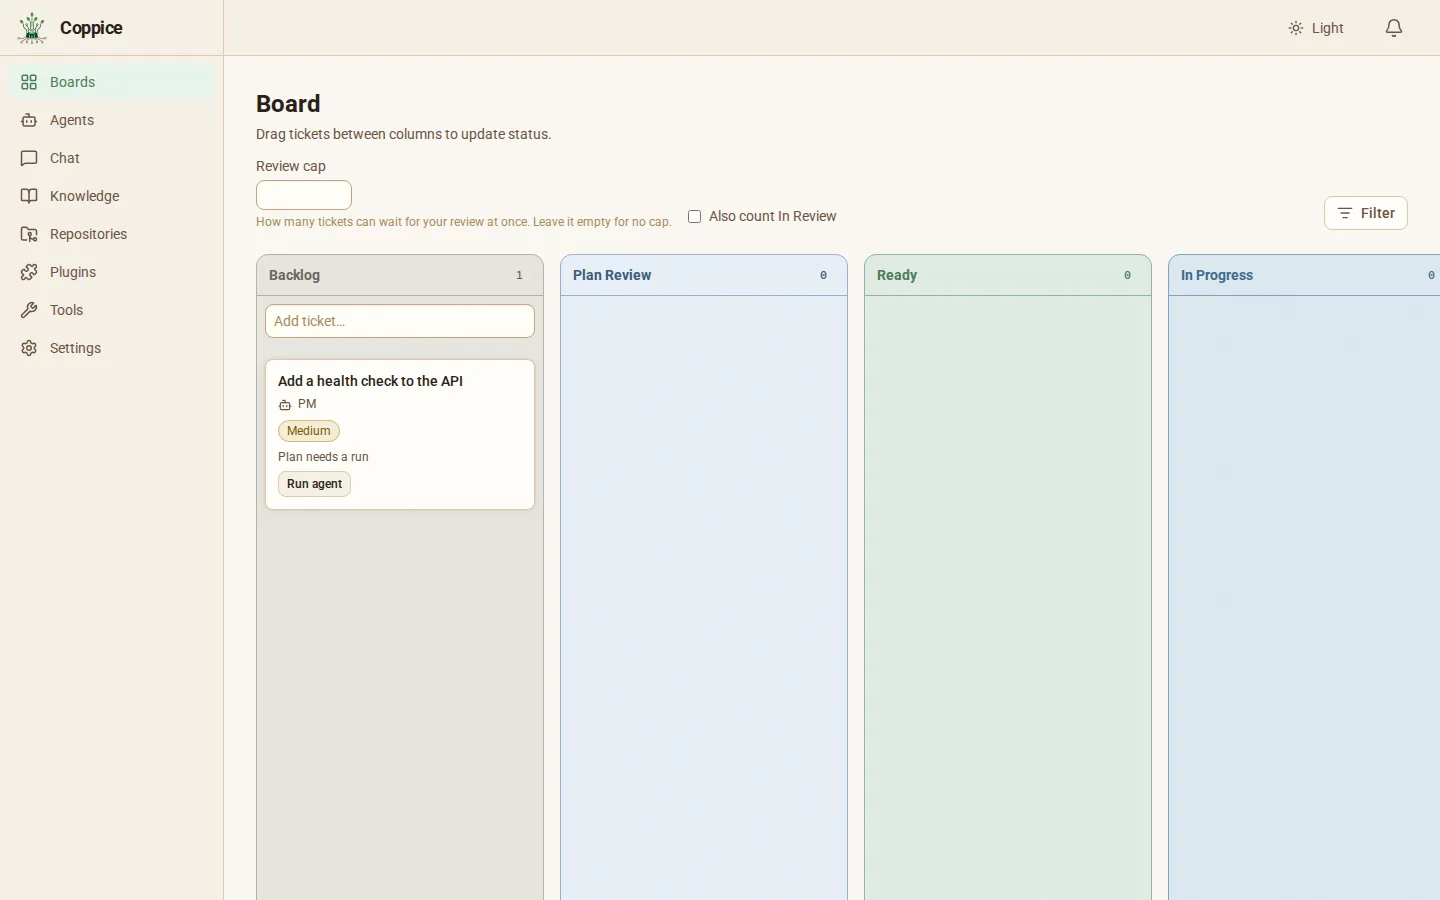
- In the Backlog column, type a title in Add ticket… and press Enter.
- Open the card.
- Click Edit to add a description, then Save.
- On Detail, set Assignee to your agent and Repository to your repository. Click Save metadata.
- Click Run agent.
The ticket switches to Live Console so you can watch the agent work. Click Stop to end the run.
Run agent stays off until the ticket has an assignee and a repository that shows Ready. Assigning an agent doesn’t start a run by itself.
What happens next
- Plan Review. The PM agent writes a plan, and the ticket moves to Plan Review. It waits there for you to approve the plan. Click Approve plan.
- Ready. When you approve, the ticket moves to Ready. Agents decide who works it next. If nobody fits, they leave it unassigned and add a comment that says why.
- In Progress. The assigned agent does the work in its own git worktree.
- Wait for Human Review. You read the diff. Click Accept in Human Review.
- Done. A Done card may show “Accepted, not merged”. Open the ticket and choose Merge…, or Create PR via API if you’d rather review it as a pull request.
To skip the plan, check Skip planning on the ticket. It goes from Backlog straight to Ready.